
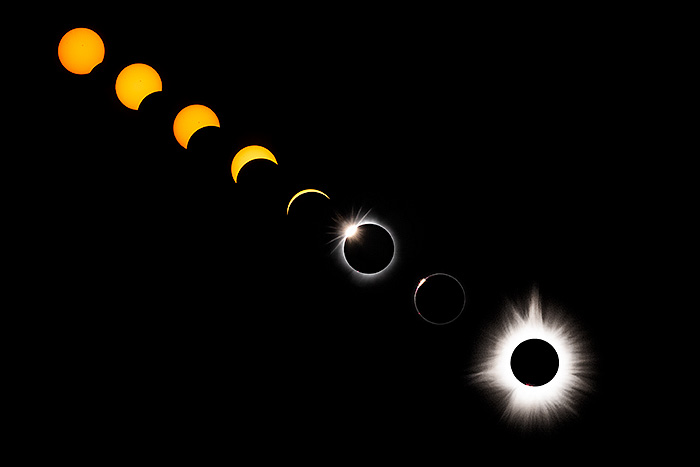
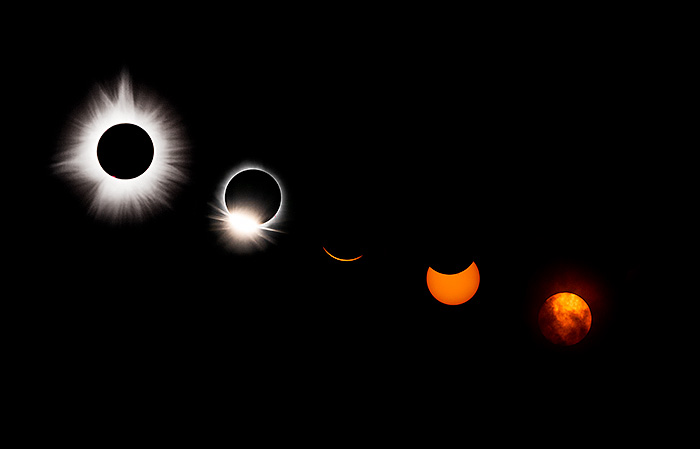
Progression from 1st and 2nd Contact to Totality
Sometimes you don’t need to travel far away to see an amazing sight. In fact, you might not even need to leave your own backyard! Lucky for me this week, I was already in the path of Totality when the 2024 Total Solar Eclipse passed directly overhead.
I hadn’t planned on photographing it. Didn’t have a long telephoto lens anymore. Didn’t have the required solar filters nor technical know-how to photograph an eclipse— which involves fast-changing camera settings based on specific timing of different phases to capture some features that only appear for mere seconds!
But then I got caught up in the buzz around me. A visiting astronaut was coming to speak about this rare event at the local university. Eighty thousand travelers were expected to ascend on our town. Apparently a TOTAL solar eclipse hadn’t been visible in Indiana since 1869. But it was happening here in a few days.
I really didn’t know the first thing about photographing it, but it was foolish not to try, right?
Preparing to shoot the Total Solar Eclipse
So I hurried to find a long lens (that zoomed to 400mm) for my Sony a7IV and a solar filter to fit it. The lens arrived one day before the big event. But my solar filter didn’t. Thankfully, hubby lent me one he intended to use on his telescope, which I screwed onto my new lens hood.
I had one opportunity to take the lens out and practice shooting the sun through the filter before the eclipse. Not easy focusing through that dark filter, and looking at the monitor instead of through the viewfinder on a bright sunny day! Since my lens was pointed almost straight up to the sky, I tilted out the camera’s LCD screen to the side so that I could look down at the screen without wearing my eclipse glasses. Trying to find the sun and reposition the lens took some practicing through the tilted monitor. Sunspots were easier to focus on than the sun’s outer rim.
Then it was a mad scramble to learn which camera settings to use and understand the different phases of what I’d see. I watched videos, took notes, and devoured info online late into the night. Sunday night I also read about the Solar Eclipse Timer app and quickly downloaded it. This app came in very handy! It calculates the 4 Contact times for your GPS coordinates, and lists the exact times (hour:minute:second) to photograph the 26 different parts of the eclipse from the partial phases, C1, C2, C3, C4 to Totality. I printed out the corresponding worksheet and wrote in the 26 times. Then followed instructions to perform sound checks and change phone settings so that I could hear the app’s announcements as it counts down the main events on eclipse day. Done. Yay. I needed all the help I could get!
Deciding Shutter Speeds for different phases of the Total Solar Eclipse
Next it was important to decide my camera settings for various phases in advance. The features I most wanted to capture were the Diamond Rings, Baily’s Beads and Corona during Totality. The frustrating part was that every resource recommended something different, from ISO 100 to 1600. And shutter speeds of 1/15 to 1/1600. Made me nervous knowing how fast these features would flicker in the sky. If my settings were off I’d miss them completely. Baily’s Beads only glimmers 1-2 seconds before Totality.
How could I even capture it when using a 1 second delay to prevent camera shake? Timing would be critical.
To help simplify the process, I chose a constant ISO 800 for the entire fast-acting C2-C3 of Totality. For the Diamond Rings and Baily’s Beads, I decided on bracketing 5 images, 1 stop exposures apart beginning with 1/2000 SS at f/16. Probably could’ve captured more of the starburst effect at f/22 but gambled that f/16 might be sharper.
Then to capture the most detail and tones of the Corona during Totality, I decided to increase continuous bracketing to 9 images, 1 stop exposures, shooting the entire range of 1 sec to 1/8000 SS. I really wanted the convenience of deciding the settings in advance so that I could take a few shots then shift my gaze upward to watch the total solar eclipse with my naked eye. It’s a once-in-a-lifetime event after all, and I wanted to be present in it.
Setting up my Camera the night before
These were my settings: Manual mode, manual focus, image stabilization off, Live View on, continuous bracket on: 5 images 1 stop exposures, ISO 200, auto white balance, RAW. Switched the shutter from electronic to mechanical so that I could hear it. Also made sure I could see the histogram when I shot (as Live View exposures can be very deceiving). Inserted a freshly charged battery and fast memory card. Checked the attachment of the solar filter to the lens hood of my 100-400mm lens. Practiced removing the lens hood carefully and quickly in anticipation of shooting Totality without the solar filter. Placed camera on tripod. Couldn’t find my cable release (and didn’t want to rely on my wireless remote shutter release as it doesn’t always work in sunlight) so set up a 1 sec delay in camera when the shutter triggered.
One thing I failed to do was to check the time on my camera. (I do well to remember to change the day back after traveling overseas.) Never thought to check the actual time and coordinate that in camera. After the shoot I noticed that my camera capture time was minutes off from when I actually hit the shutter–so attempts to coordinate with times on my worksheet were completely off.
To shoot the 1st Contact of the eclipse, I decided to begin with ISO 200, f/8, 1/200 SS. The first part of the eclipse would be easy to shoot, adjusting settings leisurely as the sun slowly shrinks over the course of 75 minutes. The tricky part would definitely be during Totality which had the most fascinating features and only lasted 3 minutes 3 seconds.
TOTAL SOLAR ECLIPSE DAY
The big day was here. I went to work and took a few images of residents and caregivers getting ready to watch the eclipse, then hightailed it home to watch the eclipse in my backyard.

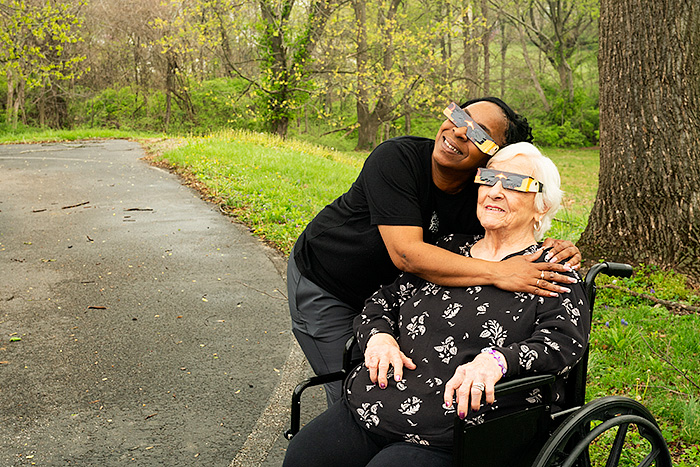
At 12:30pm, I quickly brought out my camera on the tripod, my phone with Solar Timer app activated, eclipse glasses, spare battery, worksheet of the 26 times to photograph the different phases and notes about my settings for Totality. Fumbling with my camera— trying to find the sun through the tilted LCD screen and focusing on the sunspots— was admittedly stressful as I heard the app’s countdown begin. “1st Contact in 5, 4, 3, 2, 1”—and I wasn’t ready! Why was I so nervous?
Whew. Sun was in focus. Click. Put on my eclipse glasses. First contact of the moon looked like it took a tiny bite out of the sun. The total solar eclipse had begun. It was 12:45:58.

.jpg)
The next shot was 2 minutes later, then 8 minutes later. The moon was taking bigger and bigger bites. I followed the worksheet times (calculated by the app for my GPS coordinates), capturing 10 images of the partial eclipse phases at a leisurely pace before the 2nd Contact began at 2:02:32.
The sun shrunk to a skinny crescent at 1:52pm. Took my last pic before changing my camera settings in preparation for the fast-moving Diamond Ring and Baily’s Beads that would flash seconds before Totality: f/16, 1/2000 and bracketing on (5 images, 1 stop exposures). When I heard the app announce, “Get ready to remove your solar filters,” I was nervous again. Careful! Do NOT bump the tripod and throw off the focus! Cuz there’s no time to check.
Totality
The sky turned dark and eerie, as the sun disappeared behind the moon. Temperatures dropped and birds stopped chirping.
Suddenly, the Diamond Ring was glittering in the sky!! Click, click, click.

.jpg)
Was wonderfully convenient to let the camera take over with bracketing, allowing me freedom to gaze upward at the sky with my naked eye. All I had to do was keep one finger on the shutter, knowing my settings were already set. I didn’t magnify any images to check anything. Just glanced at the LCD monitor occasionally to ensure that the sun was still in the frame and that exposures were good on the histogram.

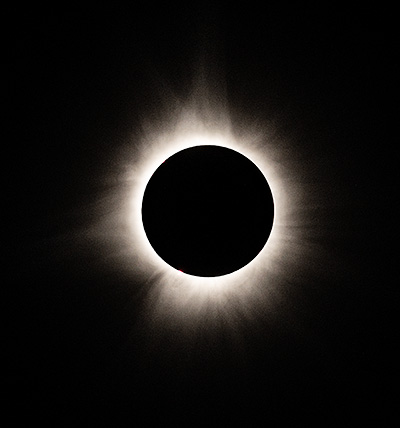
Witnessing the eclipse and watching the white flares grow and glow from the Corona was a spectacular show. I could hear the excited voices of my neighbors, oohing and aahing as the Corona’s wispy white gases leapt from the sun like flames. Children were clapping, hooting and hollering. Staring at this total solar eclipse made me surprisingly emotional. Sooo beautiful. And mesmerizing. Truly amazing that we can see this in our solar system…

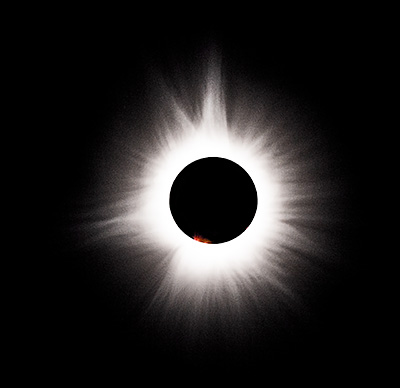
Red prominences visible on the rim of the sun.
And then I heard the app announce it was time to get ready for Baily’s Beads and the second Diamond Ring in the 3rd Contact. Already?!
It was then that I realized I’d forgotten to change my bracketing from 5 images to 9 images during the Totality phase to capture the most detail of the Corona. Darn! Totality happened VERY fast. And I got caught up watching the brilliance of it all. But, at least I had no settings to change now cuz I was already set up for the first Diamond Ring!
“Countdown in 5, 4, 3, 2, 1.” Baily’s Beads! Click.

.jpg)
It sparkled for 2 seconds. Then in a flash the Diamond Ring appeared. Click, click, click.

.jpg)
And just like that Totality was over. A short, but stunning show.
Time to put the solar filter back on and eclipse glasses. The rest of the phases happened slowly in comparison. To compensate for decreased light emitting from the sun when it first appeared as a tiny crescent, I opened the aperture to f/5.6. Then adjusted it to f/8 and f/10 as it grew larger, keeping the shutter speed at 1/200.

.jpg)
From 2:05:49 till 3:20:31, I continued adjusting my lens to follow the moving sun and photographing the partial phases of the total solar eclipse until the sun came out in full force again.
And then the clouds rolled in. You can see them swirling around the sun.

.jpg)
Talk about perfect timing. Visibility would be zero tomorrow. How very lucky we were to have seen the Total Solar Eclipse here in southern Indiana. We’d had terrible storms—12 tornados touched down in the Tristate—days ago. Power lines and trees still littered roads and yards around us. And heavy cloud cover would follow for the next few days.
But on this particular day, we had miraculously clear skies until the very end of nature’s glorious, magnificent show.
Processing
Processing the partial phases, Baily’s Beads and the Diamond Rings was pretty straightforward. Adjusted exposures and clarity minimally in Camera Raw. I was surprised to see several blue shots of the Diamond Ring on my memory card. Hadn’t changed my white balance from Auto, yet a few came out blue. Kinda liked the look so kept them.

.jpg)
I watched a couple tutorials online about processing Corona pics, and followed instructions to combine different files captured at different shutter speeds. My intent had been to bracket 9 images, 1 stop apart. But since I forgot to change my bracket setting from 5 to 9 during the excitement of Totality, I never captured a long 1 sec exposure. However, I still had a pretty good shutter speed range– from 1/15 to 1/8000.
The process to combine the shots first involved loading different files as stacks and aligning them one at a time in PhotoShop since the sun was constantly moving across the sky. Then turning the layers into Smart Objects and fine tuning various adjustments of each file. I also experimented with creating embossed gray layers and trying different blending modes to bring out more definition and details.


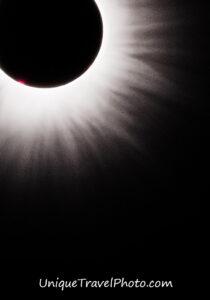
The sun’s Corona–gases in the outermost part of the sun’s atmosphere–are only visible during a total solar eclipse. Patterns and striations vary greatly from one eclipse to another due to wind. (Pics of 2017 total eclipse elsewhere in the world had some incredible formations! ) The reddish bits on the rim are solar prominences–these gigantic loops of plasma leap from the sun’s surface toward the hotter atmosphere of the corona.
Composites
Next I tried my hand at putting together composites of different combinations of the Total Solar Eclipse. Like this one showing the progression of the different partial phases from Contact 1 to Totality.


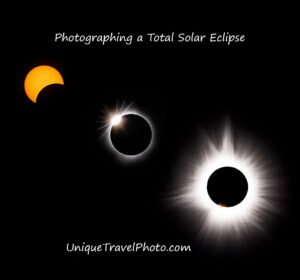
And this one showing a trio of features from the shrinking sun in C1, the Diamond Ring in C2 and Totality.

.jpg)
Or just both sets of the Diamond Rings before and after Totality.

.jpg) Or just the star features of Totality: the Corona, Baily’s Beads and the Diamond Ring.
Or just the star features of Totality: the Corona, Baily’s Beads and the Diamond Ring.

.jpg)
And the final progression of the eclipse from Totality to C3 and C4.

Corona “flower”

.jpg)
Okay, so this is not really a thing. But the shape of the Corona flares looked like daisy petals to me. So I cropped the shot, added a little golden glow and made a Corona flower.
My final image just for fun.
Pin a pic on your Pinterest board…


Lynette - WOW Kim that was fantastic!! What an amazing experience you captured with awesome photographs!! Love it!!
Kim Walker - Thank you!! It truly was amazing to see, and glad I could appreciate Totality with my bare eyes. Staring up at our Solar System made me feel so tiny in this wondrous world…
Jordan - You are truly talented! These shots are INCREDIBLE. I love the range that you captured in just a short amount of time!
Chris - Such detail and on short notice, very impressive log of events/timetables/details, coupled with beautiful shots to take in. Wow! Love the blue photos especially of the diamond ring. Hadn’t seen many of these around. Once in a lifetime event and you just happened to be in the direct path, with time and a solar filter available. Just Epic. Bravo
Kim Walker - Those late night cram sessions to learn all I could to best prepare paid off! Aren’t we lucky to live in an age where info is immediately available at our fingertips? No way I woulda figured it out without the web…
Kim Walker - Thank you very much!! It was admittedly nerve-wracking…but joyous to watch!